- Getting Started
- Code Review
- Platforms
- Configuration
- CI integrations
- Design Tools
- Developer Tools
- Web Projects
- Get Notified
- API
- Self-host
Code Review
- Getting Started
- Code Review
- Platforms
- Configuration
- CI integrations
- Design Tools
- Developer Tools
- Web Projects
- Get Notified
- API
- Self-host
Code Review
GitHub Integration
Screenshot integrates seamlessly into your Pull Request flow with GitHub. This document explains how you can set it up quickly.
Overview
In order to access GitHub's Checks API, GitHub requires us to install an app to your organization account. This app has minimal permissions: it only requires write access to Checks, and nothing else (in particular, it can't read any code).
For security reasons, we also need to verify that you are a legitimate collaborator on the repository. To do this, we will use a temporary OAuth authorization that will check that you are a valid collaborator. This authorization does need some additional permissions, but we only use it once and discard the token immediately.
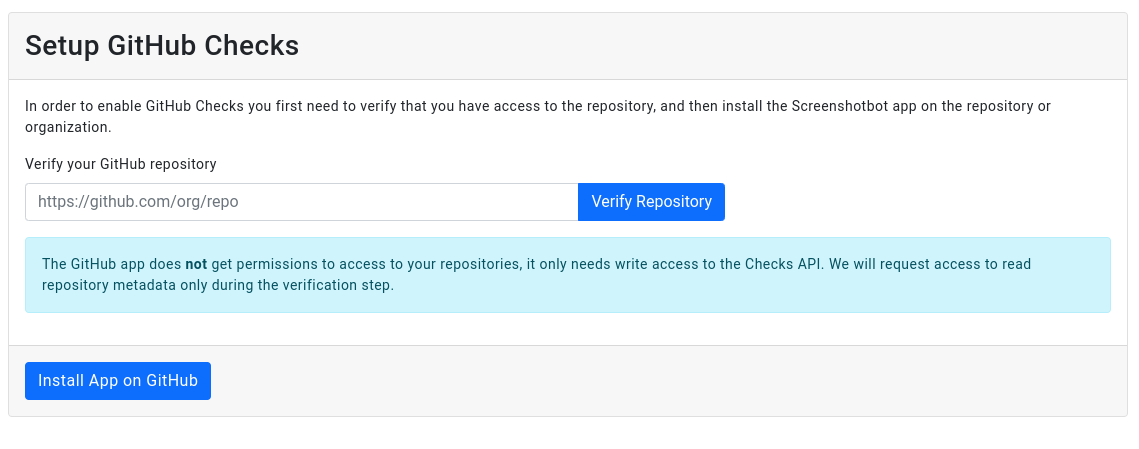
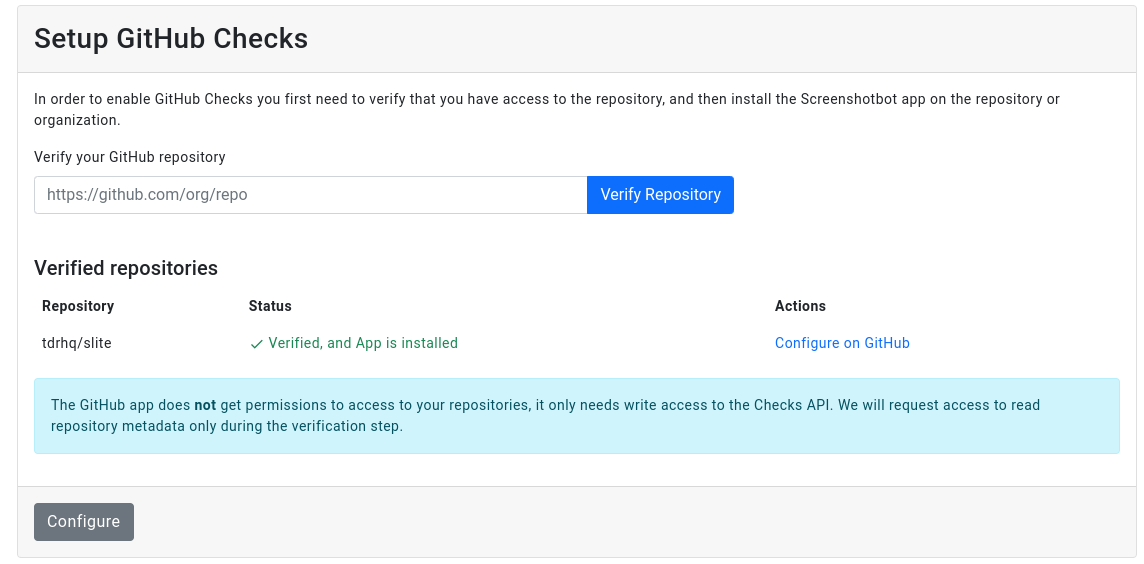
Verifying your repository
Start by going to Settings -> GitHub on the Screenshot dashboard.
You'll be given a prompt to enter the URL of the GitHub repository you want to integrate with Screenshotbot:
You will go through a standard GitHub OAuth flow to verify the repository. After which your settings dashboard might look something like this:
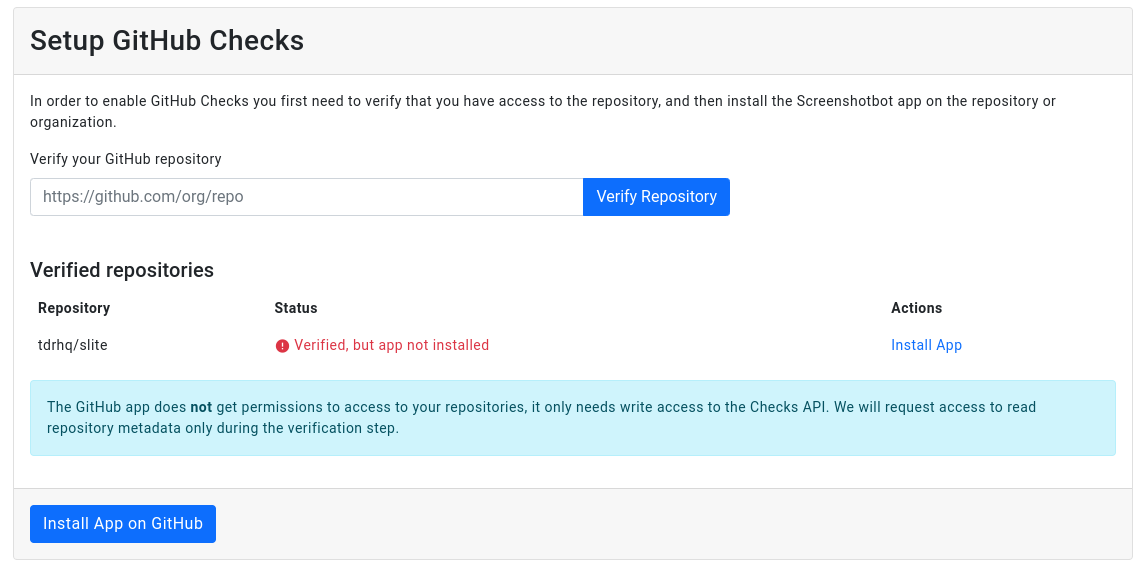
At this point, we've verified that you are a legitimate collaborator on the project, you can now install the app.
Install the App
To install the app, just click the Install App link. The Screenshotbot app will ask for a few basic permissions:

After installing the app, you should see it updated on the settings page:
If you still see "App not installed", then wait a few seconds, and hit refresh.
Set up you CI
At this point, you may set up your CI to use the Screenshotbot CLI, to upload screenshots at the end of the run. For most of the common CI systems, the CLI can read environment variables to detect if the workflow corresponds to a job for a Pull Request, and appropriately updates the Pull Request.
For Jenkins, or for some systems that we don’t have built-in support, you may add the --pull-request argument when invoking the CLI. By default, the report for the PR will be generated against the main branch, but this can be configured with --main-branch argument.
Reviewing Changes
When a Pull Request has changed screenshots, Screenshotbot will add a “failed” check. Clicking the Details link will let you review the changes.
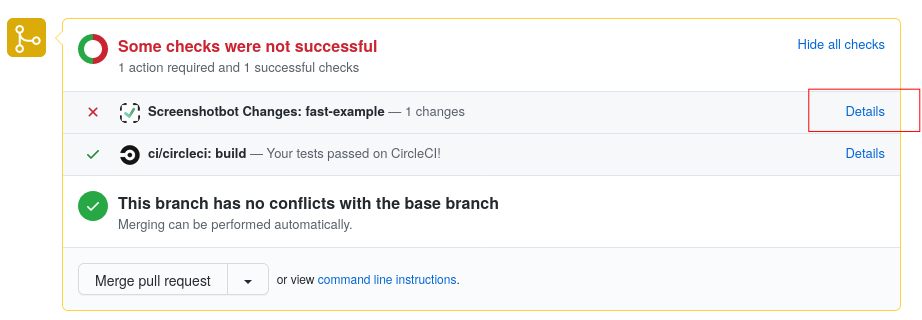
The Screenshotbot review tool would let you review and approve the changes.
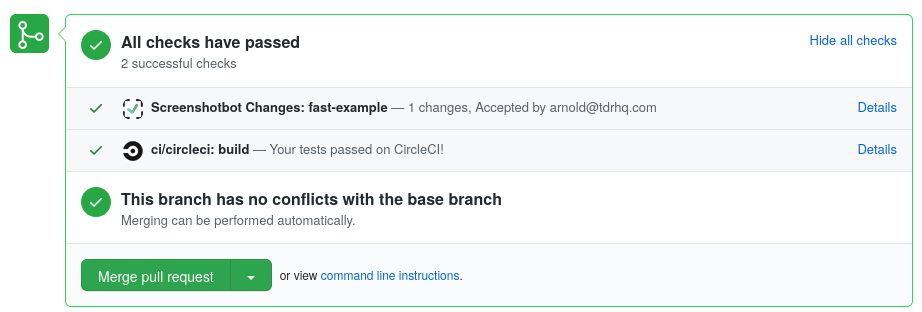
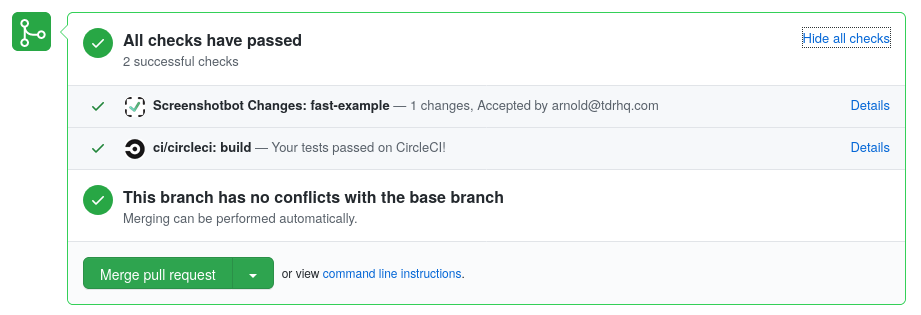
Accepting Changes
Accepting the change will update the Pull Request check to be green. The Review will also be noted.
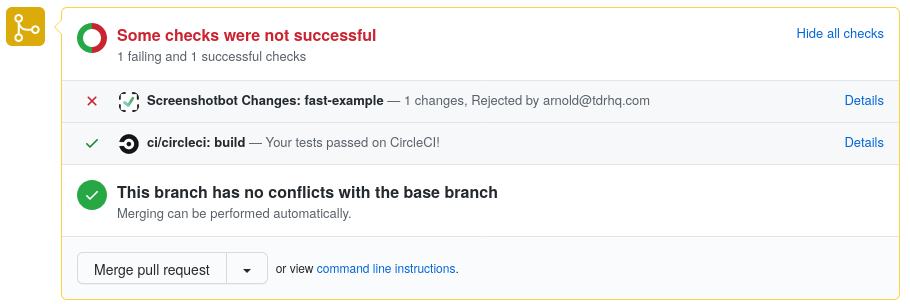
Rejecting Changes
Rejecting the the change will update the Pull Request to also include the person who rejected the change. You may Reject a change even after Accepting it.
Rebasing Pull Requests
This section is only relevant if your CI job includes a step of rebasing (or merging) your Pull Request onto your stable or master commit before running tests. In this case, you might have to pass the --override-commit-hash argument to specify the original commit hash of the Pull Request.
On CircleCI and Bitrise, we can automatically detect this from your environment variables, so you can ignore this step.
Merge Queue behavior
Screenshotbot supports GitHub's Merge-Queue out of the box. The only difference would be that you won't get a notification on Slack for each commit after they're merged, instead for each group of commits that got merged together you'll get a bulk Slack notification.
The Pull Request review process remains unchanged.
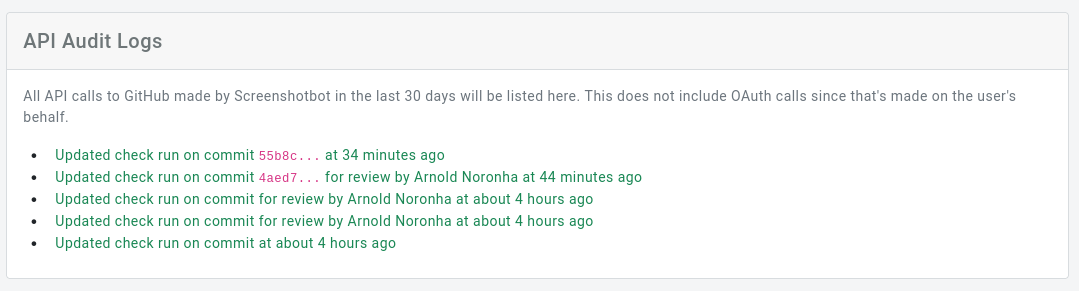
Auditing API Usage
Screenshotbot keeps a log of every API request we make to GitHub on your behalf. This log can be used to get an understanding of how we use the GitHub authorization you provide us. Additionally, if any requests fail the failure reasons will also be listed here helping you debug the integration.