- Getting Started
- Code Review
- Platforms
- Configuration
- CI integrations
- Design Tools
- Developer Tools
- Web Projects
- Get Notified
- API
Code Review
- Getting Started
- Code Review
- Platforms
- Configuration
- CI integrations
- Design Tools
- Developer Tools
- Web Projects
- Get Notified
- API
Code Review
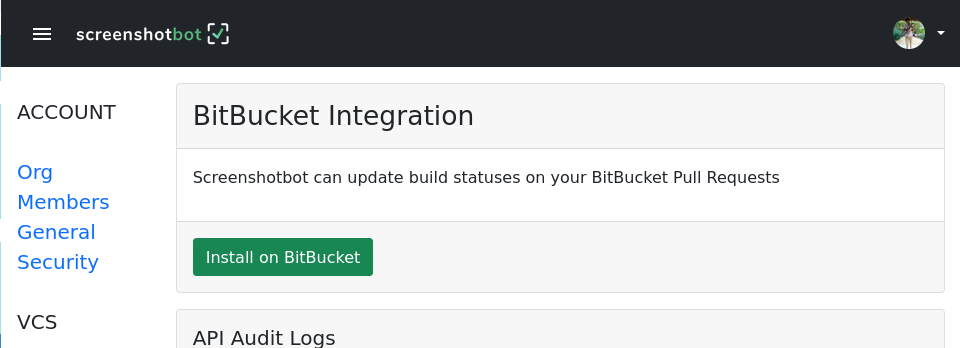
BitBucket integration
Screenshotbot can be configured to update build statuses on your BitBucket Pull Requests. Users can accept or reject screenshot changes from the Build Link in BitBucket, and the changes are immediately reflected in BitBucket.
Authorizing Screenshotbot via OAuth
To give Screenshotbot access to your BitBucket, just go to the BitBucket option in the Settings page, and click the big green Install on BitBucket button
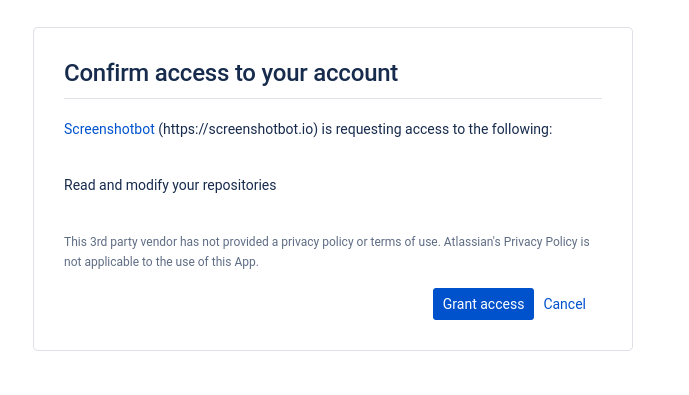
You'll be asked to confirm these permissions. Note that Screenshotbot does not actually read any of your repositories. The only API we actually use is the API to update build status. Commit hashes are determined in your CI job. (Screenshotbot stores a history of commit hashes, but no metadata or code related to each commit.)
Reviewing changes
When we detect changed screenshots on a Pull Request, we'll send a failure build status:
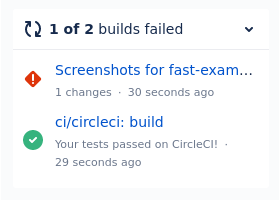
If you click the link you can review the changes, then Accept or Reject the change.
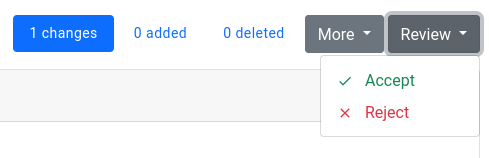
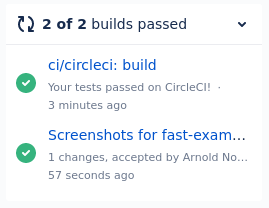
On accepting the changes, we'll update the build status back to green:
Rebasing Pull Requests
This section is only relevant if your CI job includes a step of rebasing (or merging) your Pull Request onto your stable or master commit before running tests. In this case, you might have to pass the --override-commit-hash argument to specify the original commit hash of the Pull Request.
On CircleCI and Bitrise, we can automatically detect this from your environment variables, so you can ignore this step.
Access Control
The above set up will give Screenshotbot access to all your repositories. As mentioned previously, we don't use the API for anything except pushing build statuses.
However, it's understandable that you or your security team might want to restrict access to specific repositories. We can do this by creating a new BitBucket user, and limiting the permissions for that user.
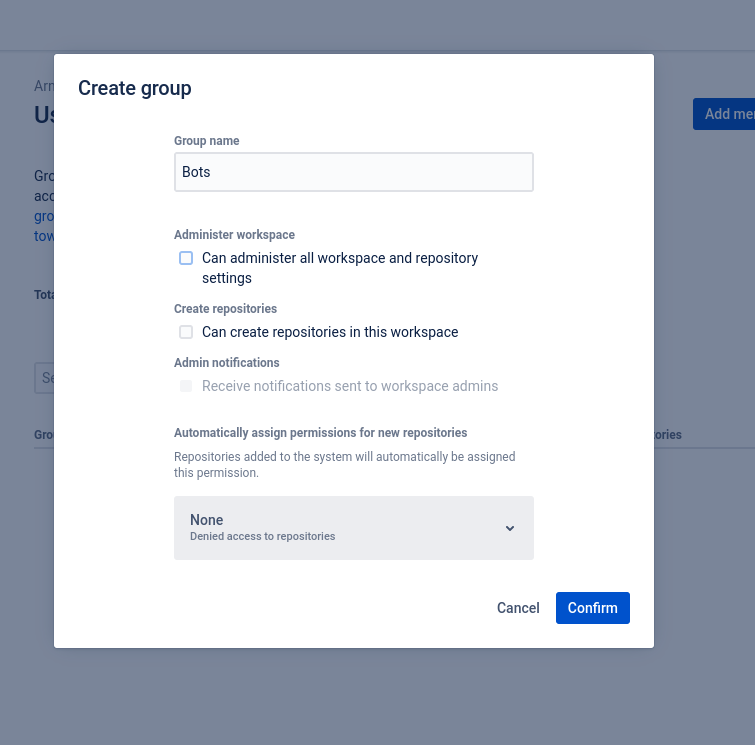
Create a new Bots group
Go to your Workspace settings, and click User groups on the left. Let's create a new Bots user group, with default permissions set to None.
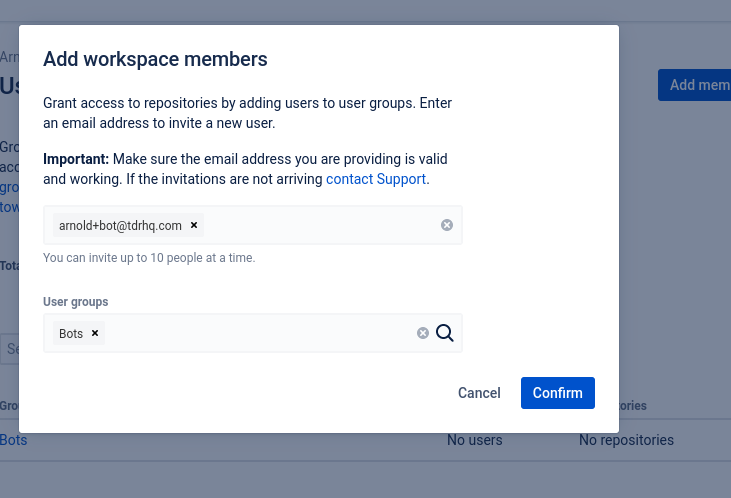
Create a new user in the group
Click the Add Member button, and invite a new member with an email ID. Make sure you have access to that email ID.
Follow the instructions in your email to set up the new user. For convenience, use a different browser, since you'll need to use your admin account in the final step. You'll have to create a new account, and accept the invite:
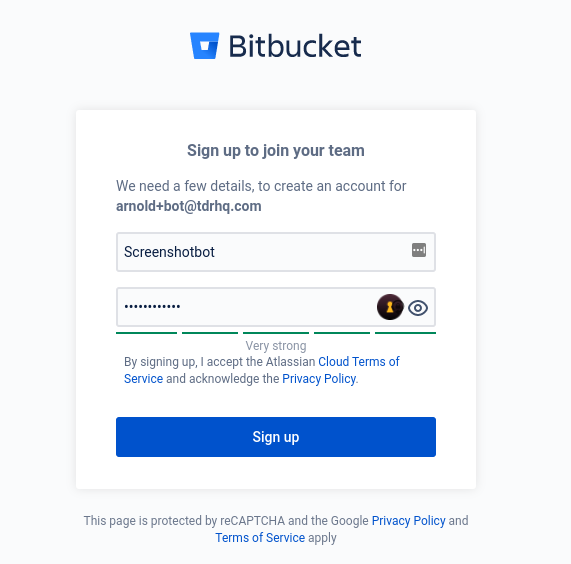
At time of writing, there's a bug in BitBucket's invitation flow: After creating the account by following the invite link in the email, you might have to go back to the email and Accept the invitation a second time to actually accept the invite.
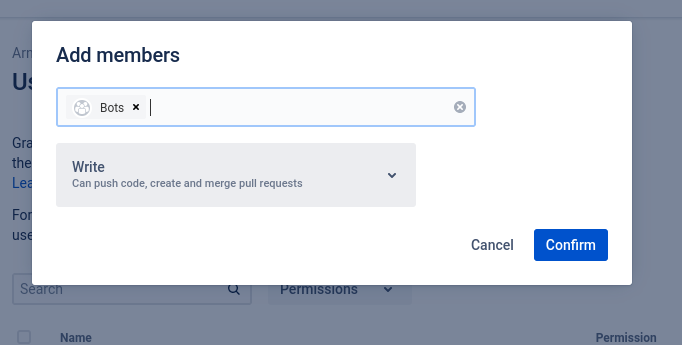
Granting access to the repo
Go back to the your admin account, and navigate to your repository settings. You can then grant access to just this repository for the Bots group.
Switching browsers to the bot account, verify that the user only has access to the repositories you want it to see.
Once this is done, follow the same steps to set up the integration, but this time make sure you're signed into the bot account.
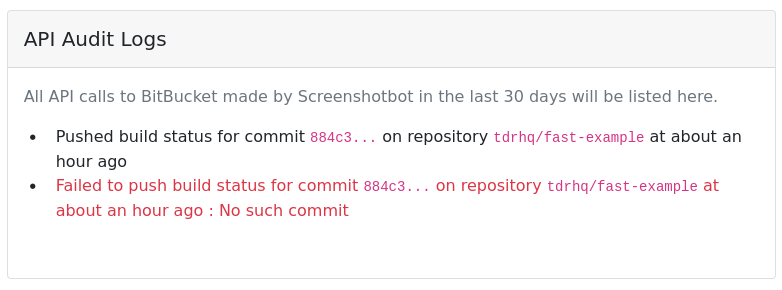
Auditing API Usage
Screenshotbot keeps a log of every API request we make to BitBucket on your behalf. This log can be used to get an understanding of how we use your access token, and also to debug any integration issues with BitBucket.
Further reading
- If you're using BitBucket, you probably also use Jira. Screenshotbot can create Jira tasks for commits once they are pushed to your master branch. Read more