- Getting Started
- Code Review
- Platforms
- Configuration
- CI integrations
- Design Tools
- Developer Tools
- Web Projects
- Get Notified
- API
Code Review
- Getting Started
- Code Review
- Platforms
- Configuration
- CI integrations
- Design Tools
- Developer Tools
- Web Projects
- Get Notified
- API
Code Review
Azure DevOps
Azure DevOps is an integrated code management and CI/CD platform. Screenshotbot completely integrates with both repositories and pipelines on Azure DevOps. In this document, we'll assume you're using Azure Pipelines to run your CI jobs.You can also use DevOps and run CI pipelines on other CI frameworks, or vice-versa.
Security Considerations
Screenshotbot does not need access to read your Azure repositories. Azure has a granular permission model, and we only request permission to update Pull Request Statuses. Commit graphs will be computed during the CI jobs.
Getting a Personal Access Token
Before we can configure Screenshotbot, you need a Personal Access Token from Azure DevOps. Make sure you give the token an expiration in the distant future. At time of writing, Azure does not let you create a token that does not expire: instead, choose a Custom Defined expiration, and pick the furthest date possible.
For scope, the only scope we need is the "Status" scope under "Code", as shown below.
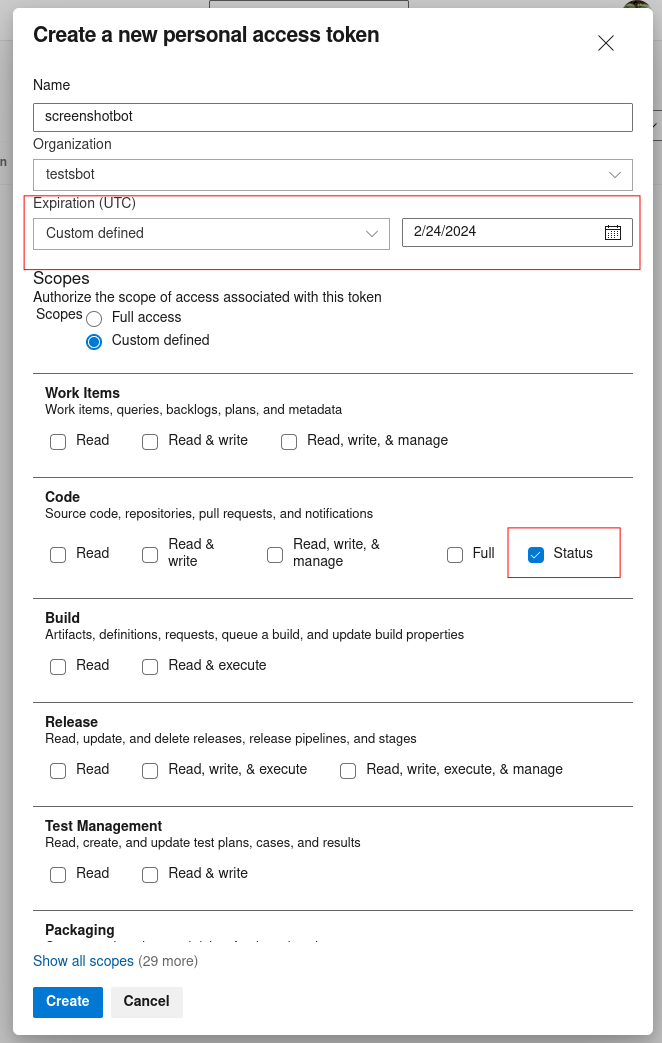
Copy the Personal Access Token, we'll use it in the next step.
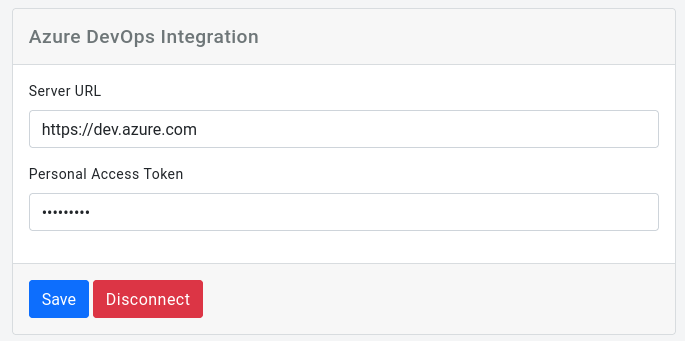
Configuring Screenshotbot
On Screenshotbot, go to the Settings page, and then click Azure DevOps. Paste the Personal Access Token here, and click Save. In most cases you can leave the server name as is.
Now all that's left to do is to make sure your Pipeline calls into Screenshotbot.
A note about shallow clones
Azure Pipelines by default uses shallow git clones. (This means the entire Git tree is not available.) The Screenshotbot CLI tool requires that the Git tree be available. We use this to compute which commit to generate a base run from.
You can disable shallow clones as follows in your azure-pipeline.yml:
- checkout: self
  persistCredentials: true
  fetchDepth: 0
The fetchDepth disables shallow clones, and persistCredentials allows us to fetch the main branch when running on Pull Requests. You can see an example of this here
Calling the CLI tool from your app
At this point, you can use our extensive integrations to upload screenshots to Screenshotbot. For example if you're just uploading a directory of pre-generated images it will look like:
- displayName: 'Upload screenshots'
  script: |
    curl https://cdn.screenshotbot.io/recorder.sh | sh
    ~/screenshotbot/recorder \
              --directory screenshots \
              --channel my-screenshot-channel
But we also provide various integrations for Android, iOS and web.
Reviewing changes
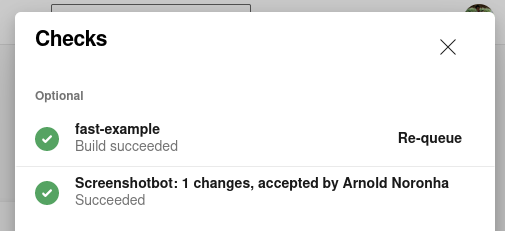
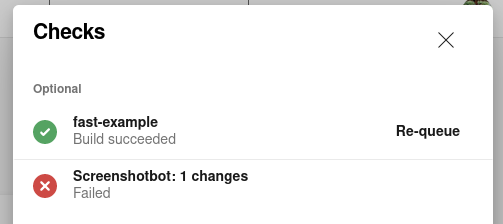
On a Pull Request, if there are any changes we'll add a failing build status.
Clicking the failure, will take you to Screenshotbot where you can review the changes, and finally Accept or Reject them.
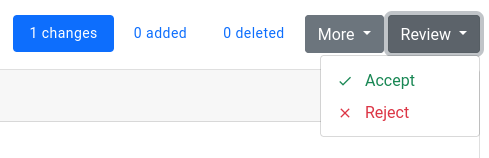
Accepting the changes will turn your build green, rejecting it will keep it red. In both cases, we'll update the build status to show who reviewed your changes.